


Hey there! As a supplier of forks clevis, I often get asked about the tools needed to install these nifty little components. So, I thought I'd put together this blog post to share all the deets with you.
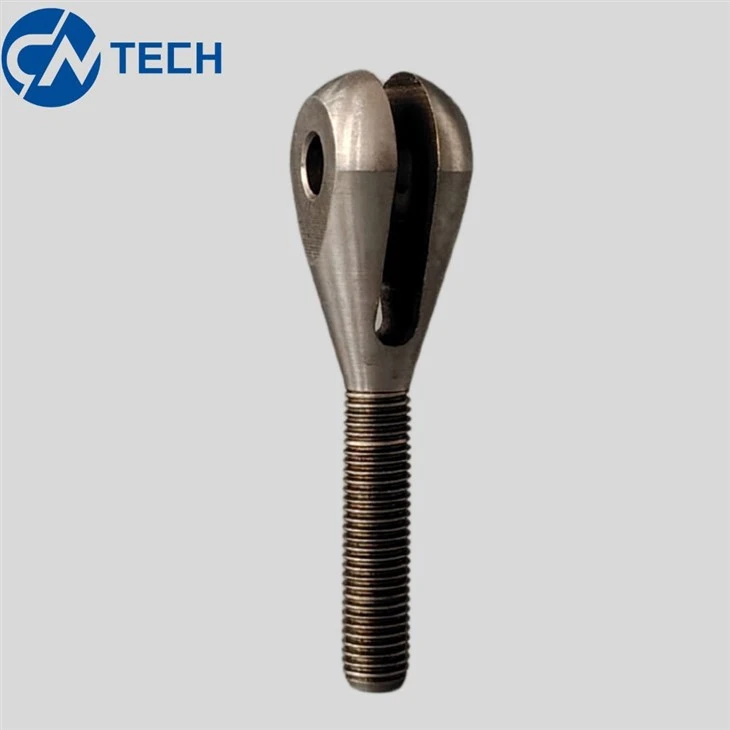
First off, let's talk about what forks clevis are. They're a type of joint accessory that's used to connect rods, cables, or other components in various mechanical systems. They're super versatile and can be found in everything from automotive parts to industrial machinery. And if you're looking for a specific type, like the Rod Clevis Y Type Joint Clevis, you'll be in good hands with us.

Now, onto the tools. The first and most essential tool you'll need is a good set of wrenches. Depending on the size of the forks clevis and the bolts or nuts used for installation, you'll want to have a range of open-end and socket wrenches. A combination wrench set is a great option as it gives you the flexibility to work in different spaces. For example, if you're working in a tight corner, an open-end wrench might be easier to maneuver, while a socket wrench is ideal for more straightforward applications where you need more torque.
Next up is a torque wrench. This tool is crucial because it allows you to tighten the bolts or nuts to the correct torque specification. Over-tightening can damage the forks clevis or the components it's attached to, while under-tightening can lead to a loose connection that could fail over time. Make sure to check the manufacturer's instructions for the recommended torque values. A digital torque wrench is a great investment as it provides accurate readings and is easy to use.
You'll also need a set of pliers. Needle-nose pliers are handy for holding small parts in place, like washers or cotter pins. They can also be used to bend or straighten wires if needed. Slip-joint pliers, on the other hand, are useful for gripping larger objects and can be adjusted to different sizes.
A hammer is another tool that comes in handy during the installation process. You might need to tap the forks clevis into place or use it to loosen a stubborn bolt or nut. A small ball-peen hammer is a good choice as it has a flat end for general hammering and a rounded end for more precise work.
If you're working with metal components, a file can be useful for smoothing rough edges or removing burrs. This helps to ensure a proper fit and reduces the risk of damage to the forks clevis or other parts. A flat file or a round file can be used depending on the shape of the surface you're working on.
For some installations, you might need a drill. This is especially true if you need to make holes in the components to attach the forks clevis. Make sure to use the correct drill bit size and drill at the appropriate speed to avoid damaging the material. A cordless drill is convenient as it gives you the freedom to move around without being restricted by a power cord.
In addition to these basic tools, it's also a good idea to have a set of safety equipment. Safety glasses protect your eyes from flying debris, and gloves can prevent cuts and abrasions. A dust mask is also recommended if you're working in a dusty environment.
Now, let's go through the installation process step by step. First, make sure you have all the necessary tools and parts ready. Clean the surfaces where the forks clevis will be installed to remove any dirt, grease, or debris. This helps to ensure a good connection.
Next, position the forks clevis in place and align the holes with the corresponding holes in the components. Insert the bolts or nuts through the holes and hand-tighten them to hold the forks clevis in place.
Use a torque wrench to tighten the bolts or nuts to the recommended torque specification. Make sure to tighten them evenly to prevent any uneven stress on the forks clevis.
If there are any cotter pins or other locking devices, install them according to the manufacturer's instructions. This helps to prevent the bolts or nuts from loosening over time.
Finally, double-check all the connections to make sure they're secure. Give the forks clevis a gentle tug to ensure it's firmly attached.
If you're new to installing forks clevis or have any questions, don't hesitate to reach out to us. We're here to help you every step of the way. Whether you're a DIY enthusiast or a professional mechanic, we can provide you with the right tools and guidance to ensure a successful installation.
So, if you're in the market for high-quality forks clevis, look no further. We offer a wide range of products to meet your needs. And if you have any specific requirements or need custom-made forks clevis, we can work with you to create the perfect solution.
Don't miss out on the opportunity to get the best forks clevis for your projects. Contact us today to start the procurement process and let's discuss how we can meet your needs. We're excited to work with you and help you get the job done right.
References
- General knowledge of mechanical tools and installation processes.
- Manufacturer's instructions for forks clevis and related components.